Course 1 is the basic course which comprises of 4 lessons. Lesson 1 covers all the basics and fundamentals of cake decorating from making and colouring icing, preparing cakes, using the piping bags, piping decorations and etc. For a beginner who has no experience of cake decorating, one will certainly benefit from this basic course. For the experienced baker/decorator, considered it a refresher course ;-) although you may be bored by it..hehe!
 For Lesson 2, we were asked to bake a cake (yes, there's HOMEWORK!!!) to decorate in class. We were to learn how to transfer pattern on to the cake using piping gel. For the cake, I chose to bake a strawberry cake, a recipe which i adapted from Sweetapolita's Strawberry Cake recipe. I have always wanted to make a strawberry cake and since Rosie's recipe uses not only real strawberries but strawberry Jell-O (yes, you read that right!) to enhance the flavour, I was intrigued.
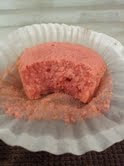
  I made a small batch of cupcakes with this batter to taste the cake. Verdict: Maybe it is just me but I find the strawberry cake tasted somewhat like cough mixture to me..haha! I believed that maybe it's the combination of strawberries and milk. Maybe if I were to reduce the milk to half cup instead of 1 cup, the cake would taste better. Will try it next time ;-)
So, back to the cake. I baked an 8' round two layers cake and we had to frost it with the Wilton Buttercream icing (IMO, it is really tooth-achingly sweet!). The base colour was light blue using WIlton Sky Blue Gel colour and was left to 'crust' before we brought the cake to class the next day. We traced the rainbow pattern on the tracing/parchment paper and gently transferred it to the cake. Then with the piping gel as the guide, we outlined the rainbow with the colours of our choice. The rainbow and the clouds were piped using star tip no.16 and the border at the bottom was piped using tip. 21. Since my eldest was into rainbows, I decided to pipe his name on the cake (only to get his complaint that he wanted a REAL rainbow cake...sheesh!!!)
It was definitely a fun class to be in, very informative as you learn tips and see techniques which you will never learn from Youtube. It helps to have a good instructor (Ms Angeline Stanley) and especially with a bunch of wonderful, crazy classmates (a few of us actually, me inclusive!), I was looking forward to the next lessons.

In the meantime, I had to have a slice (or two ;-)) of the cake (who else is gonna eat the cake?) and I am always curious to see how the cake looks like internally (gosh, sounds like a pathologist here)...
I just love the combination of colours on this cake. So pretty....
Stay tune for post on Lesson 3 (Cupcake toppers) & 4 (Graduation cake).
In the meantime, I had to have a slice (or two ;-)) of the cake (who else is gonna eat the cake?) and I am always curious to see how the cake looks like internally (gosh, sounds like a pathologist here)...
I just love the combination of colours on this cake. So pretty....

